Homemade Kitchen Island made from Reused Mess
April 10, 2008 - Make sure you like EcoJoes on Facebook to stay updated on green ways to save money and help the environment. Just click the "like" button below. Muchas gracias!
This made the front page of Care2, vote for it yo
Since me n’ Tiff bought and moved into our bodacious townhome last summer, we’ve changed a lot about it. A big thing we changed was the kitchen; with the help of Leon, Bil-lay, and 10, we took out a lot of old and put in a lot of used (new for us) things. I saved a lot of what we took out (nails, wood, etc.), and have reused those materials to make some new things.
For Valentines’ Day, I made Tiff a kitchen island with these saved materials. I started with not much, but with a lil’ gumption and elbow grease, the kitchen island was completed. Here is its story…
If you fail to plan, you plan to fail. With this handy advice in my noggin, I drew out the plans for the island. I wanted to make it the same height as our counters, and also make sure that there was enough room for our trash can to fit in it. Before I show you my plans, please remember that they are copyrighted, so if you copy them I’ll sue your pants off.

The top of the island came from the piece of countertop that we cut out to make a hole for the sink.

I reused nails that I had taken out of old pieces of wood. Some (most) of the nails were bent, therefore I had to straighten them out to use ’em.

I used some old wooden posts to build the top frame.

Here’s the wood I saved from the kitchen remodeling. Yayo is guarding it.
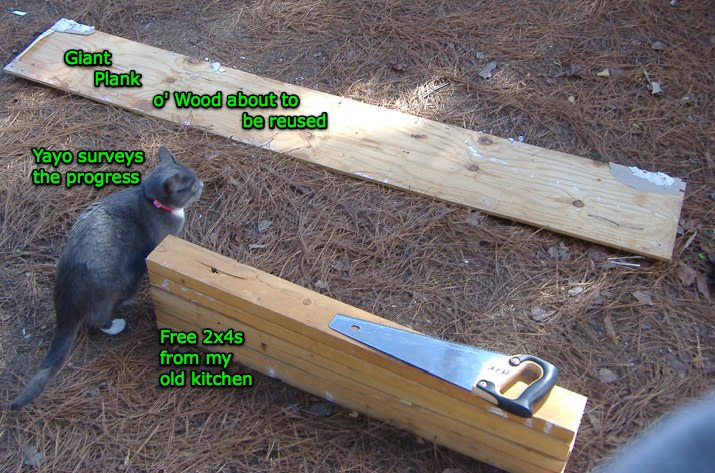
I took that giant piece o’ wood and trimmed it down so it’d be the right size. Note the clamps holding it to my flimsy card table, thus enabling me to saw the heck out of it.

I also had to use the ol’ saw to cut lots of 2x4s — two-bys, as we say in construction lingo, but I digress…

To attach the posts to the bottom platform, I used the unbent nails and some ol’ fashioned glue.

And voila, we have half of the bottom platform. The other half will be a mirror image o’ this one.

The next step wasn’t too hard. Just put the above platform onto a frame made with 2x4s, nails, and love.

I then figured that the middle of the platform might be weak, so I engineered in a special wooden piece to exponentially increase the middle of the platform’s strength. Apparently, I took this next picture as I was running by, hence the blurriness.

As you can probably tell, by this point it’s getting dark. Luckily I can expand my pupils at will. So I pressed on, and finished the other half of the bottom platform. I then connected the top frame to hold the whole thing together.

Here’s a picture where I actually USED the flash.

By now this beast of a kitchen island was almost done, but I wanted to make sure that it was muy fuerte. So I built some side supports out of our old door frame. Speaking of the old door frame, here’s part of it now.

I used some clamps to hold the side supports in place after I glued them. While they were clamped, I used some screws to attach them securely.

Phew, that was a lot of work. The next day, I primed the whole thing, and then painted it white. After that, I screwed on the wheels (they were the only non-reused thing I used to make this).
Finally, the last big step was to use construction adhesive to glue down the old counter top. After letting the adhesive dry for about a day, I presented the brand new homemade kitchen island to Tiff for Valentine’s Day. Here you can see a picture of it in all its glory, as Yayo does a quick walk-by inspection of it.

In conclusion, ’twas fun to reuse all the old wood, nails, and the old counter top, and turn them into something new and useful. I hope you enjoyed this presentation, and may you have a t-riffic day.
[url=http://www.brandiwc.com/brand-super-4-copy-0.html]ルイヴィトン スーパーコピー「ãƒãƒƒã‚°è‰²ã¯æ‰‹è§¦ã‚ŠãŒã„ã„ãŒã€è§¦ã£ã¦ã¿ã‚‹ã¨ã€é€±å›²ã®å§‰å¦¹ã¯ã“ã®ç¶ºéº—ã€æœ€è¿‘ãšã£ã¨å¿™ã—ãã¦ã€é•·ã„時間ãŒã‹ã‹ã‚Šã¾ã—ãŸã€ã„ã„感㘠ヴィトン スーパーコピー ルイヴィトンã‚ーケース コピー当店ルイヴィトン å½ç‰©ã¯å‰µæ¥9年以上ã®è€èˆ—ã§ã™ã€‚æ¥ç•Œã®é•·ã„æ´å²ã‹ã‚‰è¨€ãˆã°ã¾ã ã¾ã ã§ã™ãŒã€å‰µæ¥ 9 年以上ã®å®Ÿç¸¾ã¨ä¿¡é ¼ã®ã‚ã‚‹ãŠåº—ã§ã™ã€‚全世界通信販売ã¯6å¹´å‰ã‹ã‚‰è¡Œã£ã¦ãŠã‚Šã¾ã™ã€‚ã•ã‚‰ã«ï¼‘å¹´é–“ã§ç´„数万件ã®è²©å£²å®Ÿç¸¾ãŒã‚ã‚Šã¾ã™ã€‚ルイヴィトン スーパーコピー 販売専門ショップã§ã™!ルイヴィトン コピー ブランドãƒãƒƒã‚°ã€è²¡å¸ƒã€ã‚¢ã‚¯ã‚»ã‚µãƒªãƒ¼ã€æ‰‹å¸³ã€ãƒ™ãƒ«ãƒˆã€é´ã€è…•æ™‚計ã€ãƒã‚¯ã‚¿ã‚¤ã€ã‚¹ã‚«ãƒ¼ãƒ•ãªã©ã‚’æƒã£ã¦ãŠã‚Šã¾ã™ã€æ—¥æœ¬å›½å†…最高級ã®ãƒ«ã‚¤ãƒ´ã‚£ãƒˆãƒ³å½ç‰©ãƒ–ランド激安販売![/url]
[url=http://www.bestevance.com/cartier/tank/]財布ã®ã‚³ãƒ”ー 時間を発表ã—ã¾ã™ã¨ã¦ã‚‚é•·ãã¦ã¨ã¦ã‚‚é•·ã„å‰ã€äººé¡žã¯ã™ã¹ã¦æ›´ã«èµ¤ãåŒè¶³ã¯æ©ã„ã¦ã„ã¾ã™ã€‚1人ã®å›½çŽ‹ã¯ã‚る辺鄙ã§é ã„田舎ã®æ—…è¡Œã«ç€ã„ã¦ã€è·¯é¢ãŒã§ã“ã¼ã“ãªãŸã‚ã€ã¨ã¦ã‚‚多ãã¦ã°ã‚‰ã°ã‚‰ãªçŸ³ãŒã‚ã£ã¦ã€åˆºã™ã®ã¯å½¼ã®è¶³ã‚’å¾—ã¾ã™ç—›ãã¦ã—ã³ã‚Œã¾ã™ã€‚王宮ã«å¸°ã£ãŸå¾Œã«ã€å½¼ã¯ãŠã‚Šã¦ã„ã£ã—ょã«å‘½ä»¤ã—ã¦ã€å›½å†…ã®ã™ã¹ã¦ã®é“ã¯ã™ã¹ã¦ä¸€å±¤ã®ã»ã‚‰ã«æ•·ãã¾ã™ã€‚å½¼ã¯ã“ã®ã‚ˆã†ã«ã™ã‚‹ã¨æ€ã£ã¦ã€è‡ªåˆ†ã«ãªã£ã¦ã€ã¾ãŸå½¼ã®äººæ°‘ã«å¹¸ç¦ã‚’ã‚‚ãŸã‚‰ã™ã“ã¨ãŒã§ãã¦ã€ã¿ã‚“ãªã‚’æ©ã‹ã›ã¾ã™æ™‚ã‚‚ã†å—ã‘ã¦ç—›ã„苦ã—ã¿ã‚’刺ã—ã¾ã›ã‚“。ãŸã¨ãˆã—ã‹ã—最も国内ã®ã™ã¹ã¦ã®ç‰›ã‚’殺ã—ã¾ã™ã¨ã—ã¦ã‚‚ã€å分ãªçš®é©ã‚’も調é”ã—ãã‚Œãªã„ã§ã€è²»ã‚„ã—ãŸé‡‘éŠã€ä½¿ç”¨ã™ã‚‹äººåŠ›ã€æ›´ã«ã¯ã‹ã‚Šã—ã‚Œã¾ã›ã‚“。ã¾ã£ãŸãã§ããªã„ãŒã€ç”šã ã—ãã«è‡³ã£ã¦ã¯ã¾ãŸã‹ãªã‚Šæ„šã‹ã§ã€ã—ã‹ã—国王ã®å‘½ä»¤ãªãŸã‚ã€ã¿ã‚“ãªã‚‚é を振ã£ã¦ãŸã‚æ¯ã‚’ã¤ãã“ã¨ã—ã‹ã§ãã¾ã›ã‚“。1人ã®è¡æ˜Žãªå¬ä½¿ã„ã¯å¤§èƒ†ã«å›½çŽ‹ã«æ案を出ã—ã¦ã„ã¾ã™ï¼šã€Œå›½çŽ‹ï¼ã©ã†ã—ã¦ã‚ãªãŸã¯å¤§å‹¢ã®äººã‚’å‹•å“¡ã—ã¦ã€ãã‚“ãªã«å¤šã„牛ã«å‘½ã‚’æ§ã’ã¦ã€ãã‚“ãªã«å¤šã„金éŠã‚’費やã—ã¾ã™ã‹ï¼Ÿã‚ãªãŸã¯ä½•ã¯ä¸¡ã®å°ã•ã„ã»ã‚‰ã§ã‚ãªãŸã®è¶³ã‚’ã—ã£ã‹ã‚ŠåŒ…ã‚€ã ã‘ã§ã¯ã‚ã‚Šã¾ã›ã‚“ã‹ï¼Ÿã€å›½çŽ‹ãŒèžã„ãŸã®ã¯ã¨ã¦ã‚‚é©šã„ã¦ã€ã—ã‹ã—ã‚‚ã™ãæ‚Ÿã£ã¦ã€ãã“ã§ã™ãã«å‘½ä»¤ã‚’å–り消ã—ã¦ã€ã“ã®æ案を新ãŸã«æŽ¡ç”¨ã—ã¾ã™ã€‚èžãã¨ã“ã‚ã«ã‚ˆã‚‹ã¨ã€ã“ã‚Œã¯ã€Œé©é´ã€ã®ç”±æ¥ã§ã™ã€‚世界を変ãˆãŸãã¦ã€é›£ã—ã„ã§ã™ï¼›è‡ªåˆ†ã‚’変ãˆã¦ã€æ¯”較的容易ã§ã™ã€‚全世界を変ãˆã‚‹ã‚ˆã‚Šã‚‚ã€å…ˆã«è‡ªåˆ†ã®–「自分ã®åŒè¶³ã‚’包ã¿ã¾ã™ã€ã‚’変ãˆã‚‹ã»ã†ãŒã„ã„ã§ã™ã€‚自分ã®ã„ãã¤ã‹ã®è¦³å¿µã¨æ–¹æ³•ã‚’変ãˆã¦ã€å¤–æ¥ã®ä¾µç•¥ã‚’防ãŽæ¢ã‚ã¾ã™ã§ã€‚自分ã§å¤‰ãˆãŸå¾Œã«ã€ç›®ã®ä¸ã®ä¸–ç•Œã®è‡ªç„¶ã¯ã™ã引ã続ã変ãˆã¾ã—ãŸã€‚[/url]